Last Updated on March 6, 2023
Are you struggling to keep your textured shower walls clean? Is dirt and grime refusing to budge no matter how much scrubbing you do? No worries because we have just the most suitable solution for those tough-to-reach crevices.
Baking soda and vinegar can eliminate the need for expensive chemicals and scrubbing. With this natural combo, you can eliminate even the toughest soap scum, mildew, or mold.
Starting with a thorough inspection of the shower wall, preparing the wall surface, and using the right type of cleaning solution, will ensure that your textured shower walls stay clean.
Read on to discover how this quick yet powerful combination will give your shower some tender loving care. With just a few easy steps, you can have that sparkling shine.
How to Clean Textured Shower Walls: 6 Steps
Cleaning textured shower walls can be a daunting task, but with the right approach, you can get them looking sparkling clean in no time. Here’s how to do it:
Step 1: Preparation and Inspection Before Cleaning
When preparing to clean textured shower walls, it is important first to gather all the necessary tools and materials. You’ll need a scrub brush or sponge, baking soda, distilled white vinegar, a plastic bucket or container for mixing the solution, rubber gloves, and safety glasses.
Inspecting the wall for any problem areas and types of dirt or soiling that may require pre-treatment before continuing with the cleaning process. Common areas of concern include stains and soap scum that are difficult to remove with standard cleaning methods.
If present, these should be addressed before moving on with the cleaning process for optimal results.
Step 2: Preparing the Textured Wall Surface for Cleaning
Once all of the required materials have been gathered and inspected, it is time to begin prepping for cleaning the textured wall surface. To do this properly, start by using a soft bristle brush or other suitable scrubbers to remove any loose grime and soap scum from the shower wall.
This ensures that all dirt particles are removed before applying any solutions or cleaners, which could cause further damage if left on during the cleaning application. Make sure all of these particles are gone before going on to step 3.
Step 3: Make a Homogeneous Solution
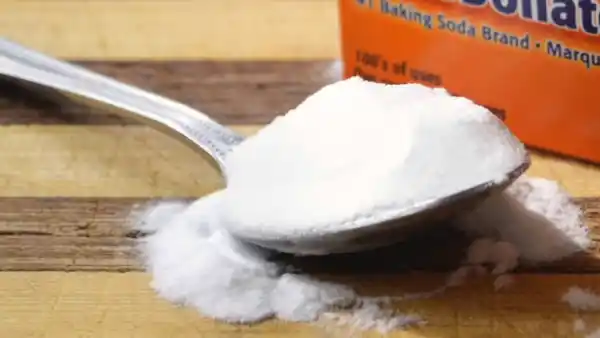
The last step in preparing your textured shower walls for cleaning is to create a homogenous solution out of baking soda and distilled white vinegar. This will help loosen stubborn dirt particles without damaging your wall’s texture too much.
To make this mixture correctly, measure out equal parts of both ingredients into a plastic bucket or other suitable container, then stir thoroughly until all ingredients are evenly distributed in a homogenous mixture.
This solution should be applied directly onto your wall’s surface and then allowed some time (more than 15 minutes) before being wiped away.
Step 4: Put the Solution Into Action
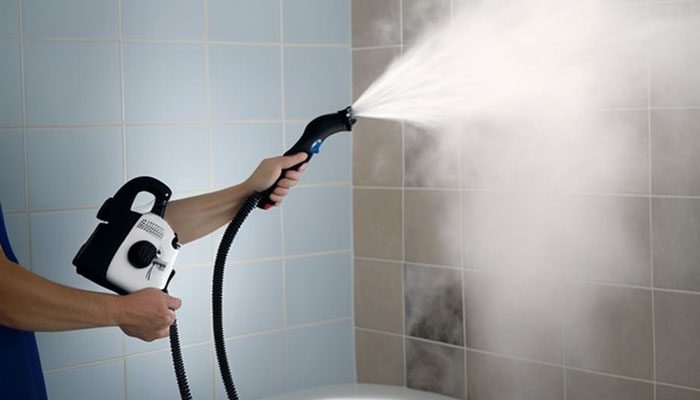
Once you have prepared your cleaning solution, it’s time to implement it. Take a spray bottle filled with your homogeneous solution and spray it evenly across all surfaces of your textured wall that need cleaning. Spread the solution evenly over discolorations or staining marks on your wall surface using a sponge or soft cloth.
You will need to wait 10-15 minutes for this solution to work on the stains. If you need to, use an old toothbrush to scrub gently so you don’t damage the wall surface. Upon being satisfied with the results you have achieved so far, reapply the solution again if necessary until you reach the desired level of cleanliness.
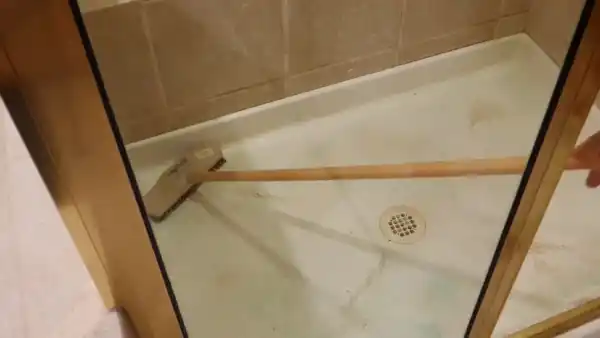
Step 5: Rinse off Excess Baking Soda/Vinegar Solution
Once all stains have been successfully removed from your fiberglass shower walls, thanks to the homemade cleaner. It’s time to rinse off its excess residue so the surfaces won’t be damaged by it later.
To do this, simply grab a bucket filled with warm water and begin pouring its contents over those same affected areas previously mentioned. While scrubbing away at them using either our old toothbrush or our hands directly instead.
Continually rinsing everything until all residual baking soda/vinegar mixture has been completely washed away here too. Afterward, make sure not to leave any residues behind afterward once done here too.
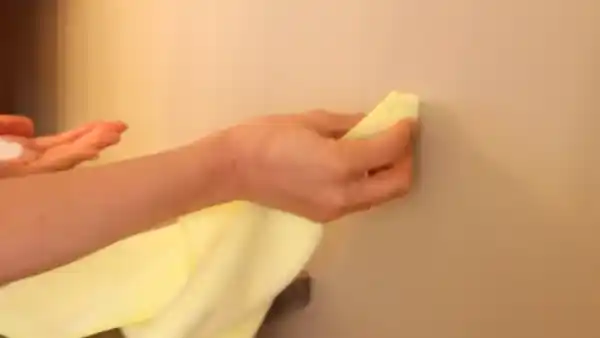
Step 6: Dry Off the Textured Surface
After rinsing off each sectional area of the wall surface with cold water as instructed above during step five. It is now time to dry things off completely. Start by taking towel cloths or large microfiber towels (either one works fine) that have been dampened previously via running cold water over them.
Then start wiping away excess moisture still left behind over each sectional area one area at a time. Pay extra attention not to leave behind streaks or tiny moisture beads throughout the process. This should ensure that no future issues, such as hard water marks later, occur once everything is dried off completely.
Aside from that, if needed, consider utilizing dehumidifiers within enclosed bathroom spaces where humidity levels tend to spike quickly. In these cases, setting up dehumidifiers within closed bathroom spaces can help expedite overall drying speed.
Tips for Maintaining Clean Textured Shower Walls
Maintaining clean textured shower walls may seem daunting, but with the right tips and techniques, it doesn’t have to be. Here are seven tips on how to actively maintain textured shower walls clean and looking great:
Utilize a Soft Cleaning Brush
The use of a soft cleaning brush is essential for cleaning textured shower walls. This type of brush will be able to get into the various nooks and crannies that you may not be able to reach with a cloth or sponge.
Blot After Cleaning:
Once you have finished cleaning the shower wall panels, blot it dry using an absorbent cloth or towel instead of rubbing it. Taking this simple step after each cleaning session can help improve the lifespan of your textured shower walls.
Consider Using Epoxy Paint:
An epoxy paint can act like a sealant on textured shower walls and fill in any cracks or crevices that regular cleaners may miss out on reaching. Applying epoxy paint also strengthens the wall’s solid surface, making it more resistant to deterioration.
Wipe Down Walls Regularly
Even if you don’t clean the textured shower walls daily, wiping them down regularly will help remove dirt and grime that causes discoloration. Cleaning them with a quick wipe should do the trick, but if they still look dirty or discolored, use mild cleansers like those mentioned earlier.
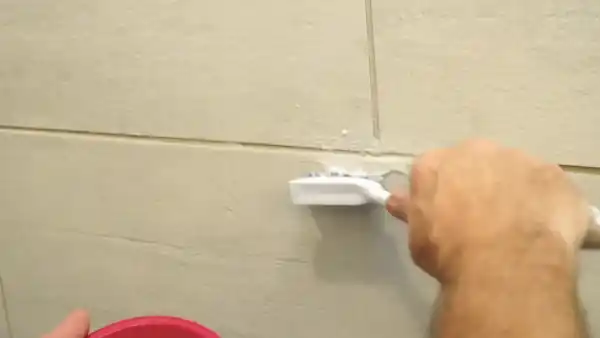
Pay Attention To Seams And Grout Lines
Seams between tiles and grout lines often tend to accumulate dirt more easily than in other areas. Therefore make sure these areas are given extra attention when you’re doing regular cleanup sessions around your bathroom.
Avoid Harsh Chemicals
Strong chemical cleaners may seem like they might do a better job at removing tough stains on the textured shower base. But it’s important not to forget how damaging they can be in comparison. If possible, stick with milder solutions, such as baking soda mixed with warm water.
Ventilate Properly
Make sure there’s adequate ventilation in your bathroom by opening windows whenever possible during baths/showers. This will help reduce humidity levels which can contribute towards mold growth on both surfaces and within grout lines between tiles on the shower tile.
How Often Should Textured Shower Walls Be Cleaned?
Generally speaking, textured shower walls should be cleaned on a monthly basis to prevent the buildup of dirt, mildew, and other bacteria. Regular cleaning can also help prevent dish soap scum and hard water spots. Although, the frequency of cleaning may vary depending on how frequently the shower is used.
If you use your shower regularly, it is recommended to clean your textured shower walls at least every two weeks. Make sure to use a mild cleaner or the above method for textured surfaces so that you don’t damage or scratch the textured ceramic tile.
Is It Necessary to Wipe Textured Shower Walls Every Time?
It is not strictly necessary to wipe down textured shower walls after each use, but it is definitely recommended. This will help keep your walls looking good and prevent soap scum and hard water stains from building up over time.
Also, wiping the walls down after each use will help ensure that any leftover moisture doesn’t have time to settle into the texture grooves. Which can cause further damage over time. For the best results, use a soft cloth or sponge on textured surfaces when you wipe down your walls after taking a shower.
Are Textured Shower Walls More Likely To Get Dirty?
Yes, textured shower walls are more likely to get dirty than smooth surfaces due to their rough texture, which provides more places for dirt and grime particles to settle into. Aside from that, the uneven nature of these surfaces makes it harder for water droplets to bead up and run off as they would on a smooth surface.

Thus creating an ideal area for soap scum, mildew, mold, and other debris to accumulate over time. Also, these textures can hold onto moisture longer than smooth surfaces if not properly maintained. Leading to even more bacteria growth and potential problems down the road.
All of this combined makes proper cleaning and maintenance absolutely essential when dealing with heavily textured shower walls.
Conquer Textured Walls: Achieving a Clean Shower with Ease
Now that you know how to clean textured shower walls, it’s time to get scrubbing. While it may seem daunting at first, don’t worry as long as you follow the steps outlined above. You will find that cleaning textured shower walls is actually a rather straightforward task.
Make sure to use gentle cleaners, ladders, or stools for hard-to-reach areas, and wear protective gear if necessary. And above all else, take your time and be thorough. With proper care and attention, your textured shower walls can look as good as new.