Last Updated on August 28, 2023
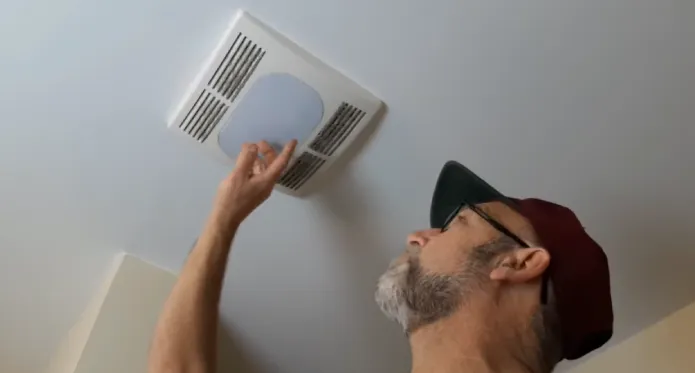
Need an easy, effective way to keep your bathroom free of dirt and dust? Regularly cleaning your exhaust fan with light is the answer. Not only does it help maintain optimal airflow in your home for improved comfort and air quality, but this simple task could also make a huge difference in keeping allergies or asthma at bay.
Remove the fan components and screws, then wipe down the blades with a mild detergent solution. Vacuum around the grille for improved airflow, and disinfect surface areas exposed to dirt or moisture buildup. For preventive maintenance purposes, regularly replace filters in your bathroom exhaust fan with light.
Discover how to clean bathrooms with an exhaust fan with light safely and effectively. Learn the necessary materials and follow step-by-step instructions for various types of fans, all designed to maintain a safe, healthy, and sparkling environment in your home.
How To Clean Bathroom Exhaust Fan with Light: Easy 10 Steps

Tools and Materials Needed to Clean:
Materials & Tools Required for Cleaning Bathroom Exhaust Fan with Light:
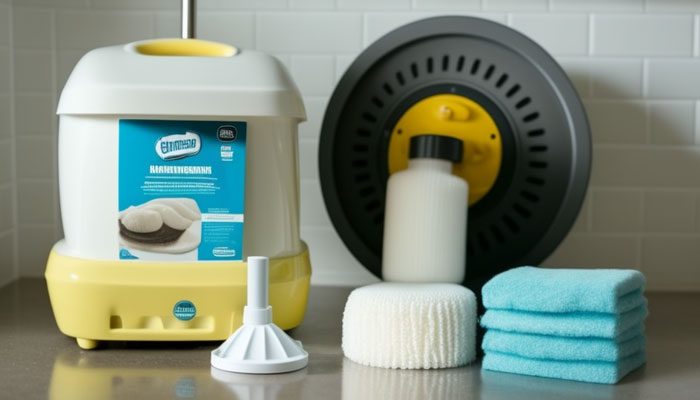
- Duster or vacuum cleaner: To whisk away dirt, dust, and cobwebs from the blades of the fan and light cover.
- Soft cloth: For wiping down the blades and light cover.
- Mild detergent or all-purpose cleaner: To remove tough stains or grease from the fan blades and the cover of the light.
- Bucket of warm water: Mix with an all-purpose cleaner or mild detergent to clean the blades and control panel of the fan.
- Brush (optional): Scrub stubborn stains off blades and covers.
- Safety goggles/glasses: To protect your eyes from dust particles while cleaning.
- Lint roller: For removing lint that may have built up on blades and light covers.
- Disposable gloves: To keep hands clean while handling dirty surfaces during cleaning.
- Old toothbrush (optional): To scrub dirt, grime, and other debris off of hard-to-reach areas of the fan blades and light cover.
Disassembling the Bathroom Fan: In Steps
Step 01: Carefully unplug the bathroom extractor fan with light from the wall and switch off the circuit breaker.
Step 02: Place a ladder near the unit to access it comfortably and safely.
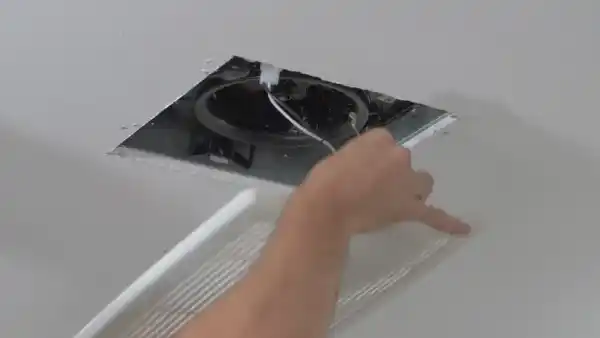
Step 03: Carefully loosen and remove the screws which secure the fan’s outer housing to the ceiling joists or wall studs.
Step 04: Once all of the screws are removed, carefully lower the fan unit from its mountings to begin disassembly.
Step 05: Unscrew and remove any additional screws, which may keep other parts of the assembly together, depending on your fan and light combination model.
Step 06: Pull out the wiring harness, which connects to the electrical supply line and light bulb holder, to disconnect them completely.
Step 07: Inspect each part of the unit carefully before beginning disassembly to make sure there are no additional components that need removal or adjustment before moving forward with a full breakdown of components within the fan assembly enclosure.
Step 08: Remove any covers which protect the motor, blades, or other components from view. These will usually be secured by several small screws along an edge or on top of a panel that needs removal for access to internal components for the full disassembly process.
Step 09: Take extra care when handling the motor, fan blades, light bulbs, and any other delicate components, as damage may occur if they are not handled properly during the removal process.
Keep track of any loose hardware such as nuts, bolts, or clips during this step to ensure all pieces are accounted for when reassembling later on down the line.
Step 10: Securely place all parts inside foam padding clearly labeled with the corresponding component number/name to avoid confusion when reassembling later.
Take pictures at different angles if necessary to have visual reference points when putting it back together again at the end of the project.
Disassemble the Bathroom Fan: Keep Track of the Different Components and How They Fit Together
Before you begin disassembling the exhaust fan with light, it’s important to create an organized plan that will help you keep an eye on the various components and how they suit concurrently.
First, gather all the necessary tools and supplies. You’ll need a screwdriver, wire cutters, and a container to store screws and other small pieces. Inspect the ceiling-mounted fan for any visible signs of damage or corrosion.
If any components look loose or damaged, it is best to replace them before taking the fan apart. Next, turn off the circuit breaker for the fan. To be extra safe, use a voltage tester to ensure electricity is no longer running through the wiring.
This is also a good time to take photos so you can document how everything looks before taking it apart. Once you have ensured that there is no power running through the system and taken photos of its current state, you can remove screws from each component one at a time, starting with the light fixture itself.
After unscrewing all of the necessary screws from each component (e.g., exhaust fan housing, grill cover, motor housing), carefully place them into your container for safe keeping and note which screws go where in case some are similar sizes or shapes so that you don’t mix them up when reassembling later on.
Carefully remove any electrical wiring to access further components, such as light bulbs or batteries, without damaging them, as they may be reused if they are in good condition.
Place these components into their separate containers, so they don’t get mixed up with other parts while you work on taking apart other elements of the fan and light fixture assembly.
Once all components are taken apart piece by piece and stored away safely in their own respective containers, take another look at all of the pieces before moving forward with reinstalling new replacement parts if needed or installing an entirely new bathroom exhaust fan unit altogether.
Having clear notes about which part went where can be especially helpful if something was disconnected wrong during disassembly so that you know exactly what needs to go back where when it’s time to reassemble everything again correctly once your project is complete.
Clean the Various Components of the Bathroom Exhaust Fan

Tip 1: Clean the Fan Blades
To properly clean your toilet exhaust fan with light, you’ll want to start by cleaning the fan blades. This is an important step because it helps prevent dust and other debris from building up on the fan blades, which can cause them to become less efficient.
Start by using a damp cloth or a vacuum cleaner attachment to wipe down each blade gently. Make sure you get into all the crevices and nooks. Once you have wiped them off, use a dry cloth to finish drying them off.
To give your fan blades an even better clean, you can use a mild soap and water solution and a soft-bristled brush.
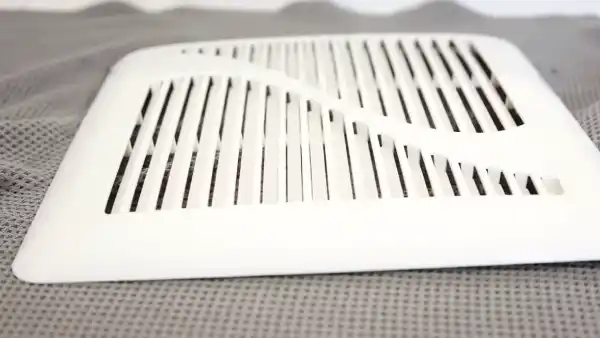
Tip 2: Vacuum the Exhaust Grille
Next, make sure that you take time to vacuum the exhaust grille of the bathroom exhaust fans. This is one of the most important parts of keeping your fan working properly since dirt, dust can easily accumulate here over time.
Use your regular vacuum cleaner’s hose attachment and move it back and forth between each individual grate. Be sure not to press too hard, as this could damage the grilles or bend them out of shape.

Tip 3: Use Mild Disinfectant on Surfaces
Once you have finished vacuuming the grille and wiping down the blades of your bathroom ventilation fan with light, it is time to disinfect those surfaces.
Using either a spray bottle filled with a mild cleanser or rubbing alcohol will help keep any bacteria or mold away from these areas to maintain optimal health standards in your home environment.
Spray onto each surface lightly while using soft circular motions with a paper towel until all surfaces are covered evenly with no excess liquid left behind on components that could cause corrosion over time if not dried thoroughly afterward.
Tip 4: Replace Filters Regularly
Lastly, make sure that you change out your filters regularly to ensure that they are working effectively in collecting dirt and other buildups before it reaches other components of your washroom exhaust fan with light, such as its motor or wiring system, potentially leading to costly repairs down the line.
To ensure your system is working at its best, filters should be changed no less than every six months. For example, if there are large amounts of smoke or cooking fumes entering the vents, you should use quality carbon-based filters and replace them more frequently, as old filters tend to clog faster.
Clean the Fan Blades, Light Cover, and the Housing
Cleaning the light cover, fan blades, and housing of a bathroom evaporator fan with light can be done fairly easily.
First, you will want to start by turning off the electricity to the fan at your circuit breaker or fuse box. This step is essential for safety and should not be overlooked. Once the power has been cut, the fan should be safe to work on.
Next, remove the light cover from its housing and set it aside. Then use a soft cloth dampened with warm water and a small amount of mild cleaner to wipe down all visible surfaces of the fan’s blades and housing.
Make sure to get into every nook and cranny, as dust can accumulate in hard-to-reach places. After that, rinse off any remaining soap residue with warm water and a clean cloth until all surfaces of both components are free of contaminants.
After you have finished cleaning both the blades and housing of your fan unit, reattach the light cover back onto its housing by following any instructions in your exhaust fan’s manual.
Finally, before you turn your power back on, make sure that all components are thoroughly dry to prevent any electrical malfunctions from occurring due to moisture build-up.
Now that everything is cleaned up, you can enjoy using the bathroom exhaust fan with light without having to worry about it becoming dirty or caked in the dust again anytime soon. With just a few simple steps, you can guarantee a clean home environment for yourself and those around you.
Reassemble the Bathroom Exhaust Fan
Step 1: First, gather the necessary tools and materials needed to reassemble the bathroom ventilation fan with light. You will need a screwdriver, wire cutters, pliers, and some extra screws.
Step 2: Carefully disassemble the fan’s housing. Start by unscrewing the screws that attach the two halves of the housing. Make sure to save all of these screws securely while you work.
Step 3: Once you have removed all of the screws, pull apart the housing carefully. Carefully slide out the fan motor assembly from the inside.
Before removing any other parts, make sure to label each one with a marker so that you can easily remember how it is supposed to be put back together later on.
Step 4: Now, take out all of the wirings from inside of the fan housing, being careful not to damage or mix up any wires in this process. Cut off any excess wires using wire cutters and strip away about ¼ inch from both ends of each wire if needed.
Step 5: Reattach all wiring connections as necessary, making sure that no exposed wires are touching each other or coming into contact with metal surfaces anywhere else inside of your fan housing.
Step 6: Take out your new light kit (if applicable) and carefully insert it into the designated area within your fan housing where it belongs.
Securely fasten each part with pieces from your light kit until it cannot move at all when given a slight tug test.
Step 7: Return your motor assembly to its optimal position within the fan housing, ensuring that there are no obstacles preventing it from operating correctly. Securely fasten with a screwdriver or pliers, whichever type of screws were used initially (Phillips head or flat head).).
Step 8: Finally, take two halves of your fan housing back together again and use your remaining screws to secure them properly back into their original positions before turning on the power switch to test whether everything works as expected.
Reassembling the Fan: Ensure that Everything is Properly Aligned and Securely Fastened

Tip #1
Ensure all parts are in the correct position and orientation before affixing them. It is important to ensure that all parts are correctly oriented and securely fastened. This can be done by comparing the fastened parts against diagrams or pictures of the reassembled fan with light.
Tip #2
Use the appropriate tools for each step of the reassembly process. Using a pair of scissors or pliers to tighten screws may cause damage to both parts and tools, so it is essential to use the proper tool for each step of the process.
Tip #3
Check all connections multiple times. When working with electrical components, make sure to double-check all connections before powering up the fan and light. This will help ensure that everything is properly connected and won’t cause any problems upon power up.
Tip #4
Double-check all wiring connections with an ohm meter. To ensure that all wiring connections are secure, it’s recommended to use an ohm meter to verify continuity between each connection point.
This is especially important when dealing with wires carrying electricity as it helps reduce the risk of fire hazards due to faulty wiring connections.
Tip #5
Tighten screws using a torque wrench instead of a regular screwdriver or ratchet set if possible. A torque wrench allows for more accuracy when tightening screws as it ensures that they are not over-tightened or under-tightened.
Both can lead to unwanted consequences regarding how long these components last and how well they perform their intended functions.
Tip #6
Wear safety glasses when assembling electrical components such as switches or outlets, as sparks may fly off during the assembly/ installation process when metal contacts come in contact with each other at high speed during power up.
Additionally, protective gloves should also be worn while handling any sharp pieces, such as screws or wires, since they could potentially cause cuts or abrasions if mishandled incorrectly.
Maintenance Tips on Bathroom Exhaust Fan
Tip #1
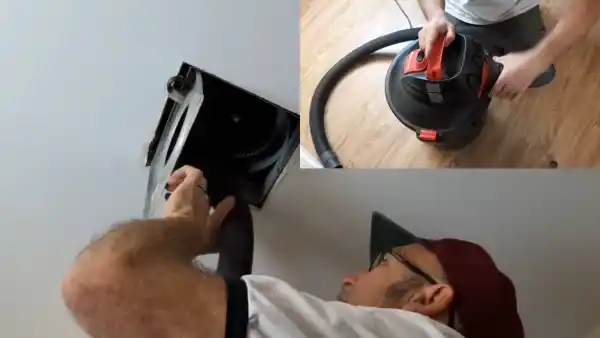
To maintain a bathroom circulation fan with light, one should clean the fan regularly. This can be done by turning off the power at the circuit breaker and then using a vacuum cleaner to clean out dust from the fan blades, motor housing, and other parts of the fan.
Additionally, it is important to check that all components are properly secured; any loose screws should be tightened, and any missing components should be replaced.
Tip #2
The housing of the exhaust fan should also be inspected regularly to ensure that no cracks have formed, as this could reduce its effectiveness in preventing water or steam from entering the attic or other spaces.
If necessary, add additional caulking around the seams between the vent cover and walls to prevent moisture from seeping in.
Tip #3
A bathroom exhaust fan with light needs sufficient airflow to operate efficiently; if not enough air is moving through, it will struggle to remove moisture from the room or bathroom effectively.
Check to ensure that there are no blockages such as lint, dust, or dirt clogging up the system; these can impede airflow and must be cleaned out periodically for optimal performance.
Tip #4
Additionally, if your bathroom exhaust fan has an integrated light fixture, ensure all bulbs are functioning correctly and replace any burnt-out bulbs as soon as possible, so they do not affect ventilation efficiency.
Consider adding insulation around wiring near where they enter into walls so that they don’t become damaged due to heat accumulation during the operation of the fan motor and lighting fixtures combined.
Tip #5
Finally, inspect your lavatory exhaust fan with light regularly for signs of wear or deterioration. This includes checking for rusting metal pieces or cracking plastic components, which could lead to the failure of your system over time if left unchecked.
Replace worn-out parts before they cause more serious damage to maximize performance and maintain proper ventilation within your home.
How Often Should You Clean Your Bathroom Fan?
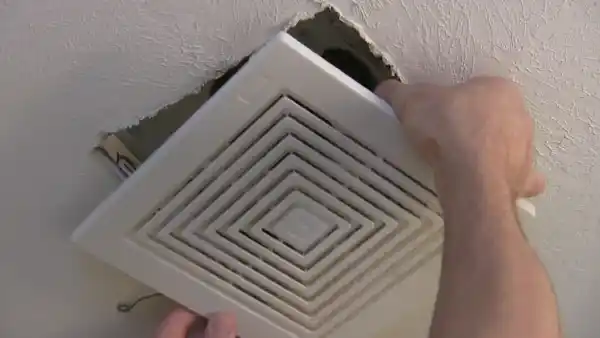
Bathroom exhaust fans can get clogged. The main cause of a clogged exhaust fan is dust and lint that accumulate in the grille over time. This build-up of junk can limit airflow and cause the fan to run inefficiently or not at all. Regular cleaning and maintenance is the best way to keep your exhaust fan running properly.
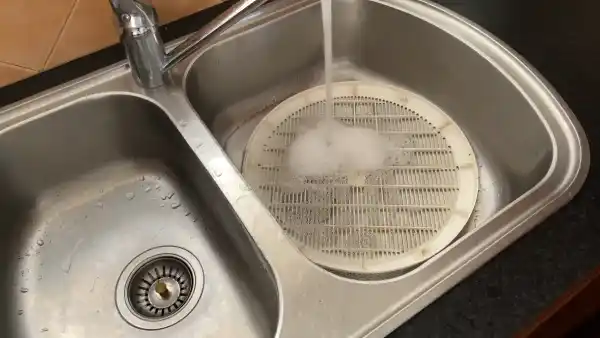
When vacuuming the grille isn’t enough, it’s essential to do a deeper clean. To do this, you’ll need to remove the grille from the fan and soak it in soapy water for a few minutes. Use a brush to scrub off any remaining stains, then rinse it with warm water before reinstalling it in your bathroom.

In addition to regular cleaning, you should check for any signs of wear or damage on the grille. If there is corrosion or other damage present, replace the grille immediately, which can lead to further problems.
You should also make sure that all of the seals are securely in place around your fan so that air doesn’t leak out while it’s operating. By regularly keeping on top of your bathroom exhaust fan’s maintenance needs, you can help ensure that it lasts as long as possible.
Without proper care, dust and lint may eventually cause your fan to become clogged, which could lead to costly repairs or replacement fees down the road.
Can the Bathroom Exhaust Fan Get Clogged?
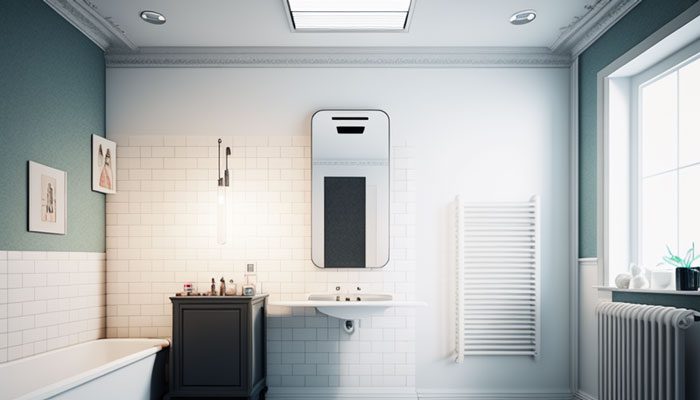
Keeping your bathroom fan clean is an important part of home maintenance, as it helps to prevent the buildup of dust, dirt, and mold. For optimal performance and air quality in your bathroom, it’s best to give the fan a thorough cleaning at least once or twice each year.
This relatively simple task only takes around 20 minutes and requires just a few basic tools. If you live in an area with high levels of humidity or if you recently completed a home renovation project involving the bathroom, then more frequent cleanings may be necessary.
It’s also wise to inspect the fan regularly for any signs of damage or excessive dust accumulation. To properly clean your bathroom fan, start by turning off the power to the unit at the circuit breaker box. Once that’s done, remove the cover from the fan by unscrewing any screws holding it in place.
Carefully inspect both the cover and motor for excessive dirt buildup or signs of damage. If necessary, use a vacuum cleaner with an extension wand attachment to remove built-up debris from both components.
To disinfect them further, use a rag soaked in warm water and mild detergent. Wait until all surfaces are completely dry before reattaching the fan cover and restoring power to the unit. Additionally, replace any worn parts, so your fan runs smoothly and efficiently for years to come.
Clean Bathroom Exhaust Fan with Light: A Quick Summary
Bathroom exhaust fan cleaning is not as difficult as you may think. With just a few simple tools and some elbow grease, you can make sure that your fan is running smoothly again in no time at all.
Be sure to follow the steps outlined in this blog post carefully for maximum efficiency. Turn off the power source before starting any work, use protective eyewear when working inside the unit, and wear gloves when handling chemicals or cleaners in the bathroom. With these tips in mind, you can ensure a successful cleaning process that leaves your bathroom sparkling like new.