Last Updated on October 17, 2023
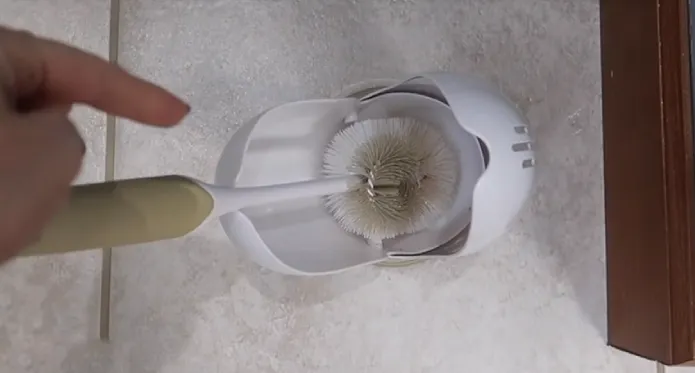
Don’t let the clutter take over your bathroom. There are plenty of accessible and affordable ways to store that cleaning brush, from built-in plunger cabinets to storage caddies and baskets underneath your bathroom counter.
You can also get creative with homemade solutions such as glass vases or recycled containers so that your storage solutions blend in with the decor of your bathroom.
We’ll discuss all these different ways to store your bathroom cleaning brush and some great ideas for homemade holders that will make organizing your bathroom easier and more enjoyable.
How to Store Bathroom Cleaning Brush: 3 Hygienic Ways

Get your cleaning brush away from cluttering up the counter and into neat, hidden storage. Follow these easy tips to get it organized in no time.
1. Store on Built-In Plunger Cabinet
Storing your bathroom cleaning brush in a built-in plunger cabinet is an ideal way to keep it close at hand while also keeping it out of sight.
You need to measure the inner dimensions of the plunger cabinet to make sure you can fit the brush or its handle inside.
The brush should be placed facing down so that the bristles are closest to the back wall of the cabinet. This will ensure maximum stability and prevent it from shifting around when you open and close the door.

If your cabinet has adjustable shelves, you may want to use shelf organizers or containers to secure the brush in place more firmly.
Once you’ve made space for your brush, tidy up any remaining items that were in there before and make sure everything is neat and organized.
2. Store on Storage Caddy
Using a storage caddy is another great option for storing bathroom cleaning brushes. It keeps all of your cleaning tools within easy reach while also providing plenty of organization opportunities.
Invest in a storage caddy that fits the size and shape of your brushes, then buy it. Remember that some caddies offer additional features, such as separate compartments for different items or removable shelves for extra storage space.
Once you have chosen a storage caddy, decide where to place it, ideally near your sink or shower, so it is always handy when you need it.
Then make sure to place all necessary items, such as brushes, scrubbing sponges, rags, cloths, etc., into their respective compartments to keep them organized and easily accessible whenever needed.
3. Store on a Bucket Underneath Your Bathroom Counter
You can store a bathroom cleaning brush in a bucket underneath the counter. To do this, start by finding an appropriately sized bucket for storing all of your bath items, including brushes and rags, as well as sponges and scrubbers, if necessary.
Place this bucket underneath your sink so that it can easily be accessed when needed without having to move anything else out of its way first.
Once you have located an appropriate spot for the bucket underneath your sink, place all of your bath items inside it before securing its lid closed.
This will help keep all of your bath items contained while also ensuring they are easily accessible when needed during daily use or while deep-cleaning more often than usual.
Things to Keep In Mind When Storing Bathroom Cleaning Brushes

When storing bathroom cleaning brushes, it is important to keep several factors in mind to ensure the safety and longevity of your cleaning supplies. In the first place, it is essential to disinfect and clean the designated area before storing the brushes.
This helps prevent cross-contamination and the spread of germs from one surface to another. It is also essential to use appropriate cleaning agents for this task, as some cleaners can be damaging or abrasive for certain materials.
Once the area has been prepared, it is important to secure the brushes in place. Proper placement will ensure that they are not damaged by movement or other items being placed in close proximity to them.
Temperature and humidity levels must be monitored regularly when storing bathroom cleaning brushes. High humidity can cause mold and mildew growth, while extreme temperatures could weaken or damage the bristles of your brush over time.
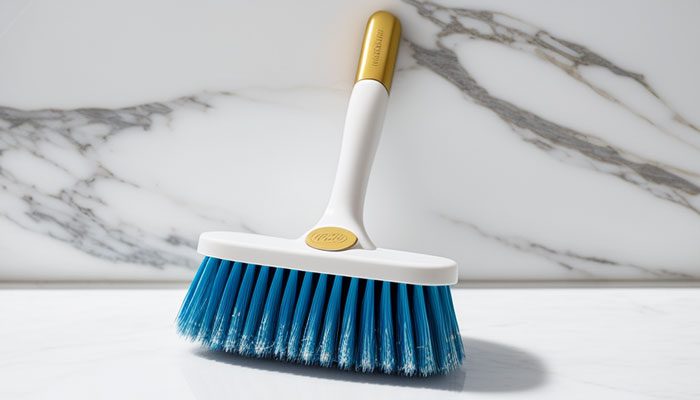
Proper ventilation should be checked regularly to create a safe environment for storing the brush and its accompanying items.
Poor ventilation can lead to the accumulation of moisture and filth, which may have damaging consequences on your bathroom cleaning supplies if left unchecked.
Considering these few steps can help maintain your bathroom cleaning brushes for more extended periods of time, thus saving you money on replacements.
What Items Can You Use As a Homemade Bathroom Cleaning Brush Holder?
1. Use Recycled Container As Bathroom Brush Holder
Making a homemade brush holder for holding bathroom cleaning brushes out of a recycled container is an easy and cost-efficient project. To begin, take a large plastic gallon, such as an empty milk jug or a large plastic container.
Using sharp scissors, cut off the top of the gallon based on the size of your bathroom brush. This will create an opening in which you can place your brushes in and out easily.
The next step is to fill the inside of the container with some water and mild soap solution, then using a sponge or cloth wipe down the sides and bottom of the inside of the container. This will help keep it clean and odor-free when storing your brushes.
2. Use a Glass Vase As a Bathroom Brush Holder
Using a glass vase as a homemade brush holder is another excellent way to keep bathroom cleaning brushes organized. This also adds some aesthetic charm to your space at the same time.
To get started, you will need an appropriate-sized glass vase of any shape that fits comfortably within your bathroom area. It’s also important that both ends of the vase are open so that you can easily slide in cleaning items like scrubbing sponges or brushes without having them become stuck inside.
Before using it for storage purposes though you must prepare it first by thoroughly washing both inside and out with warm soapy water then allowing it to dry completely before placing items into it.
Then go ahead and insert any cleaning items into it accordingly before displaying in its intended spot.
How to Clean Bathroom Cleaning Brush Before Storing?

Method 1: Use Disinfectant Spray
Using a disinfectant spray is one of the most effective ways to clean a bathroom cleaning brush before storing it away. First, it is important to rinse the brush in hot water to remove any filth or soap scum that may have accumulated on the bristles.
After rinsing, hold the handle and generously spray the brush head with a disinfectant spray. This will help to kill any bacteria or germs that may be on the brush.
Once this is done, use a disinfectant wipe to wipe down the handle of the brush and then dry it with a microfiber cloth. Finally, allow the brush to air-dry before storing away.
Method 2: Use Bleach Soaking Solution
Another option for cleaning your bathroom cleaning brushes is using a bleach-soaking solution. Bleach can be hazardous if not handled properly, so wear rubber gloves and eye protection.
To start, pour warm water and a small amount of bleach into a large bucket, preferably in an area such as a sink or bathtub that will not be affected by splashes should they occur during soaking.
Then slowly add the brushes into this solution and allow them to soak for some time, usually between five minutes up to half an hour, depending on how dirty they are. After that, wash off all the residue with normal water.
Finally, allow them to dry fully before storing them away, as moisture can lead to mildew growth which can corrode your brushes.
Method 3: Clean With an All-Purpose Cleaner
Using all-purpose cleaning products is another great way to keep a bathroom cleaning brush clean.
Put warm water in a bucket or sink, then add an appropriate amount of all-purpose cleaner, according to the label.

Submerge the cleaning or toilet bowl brush in this solution and let it soak for several minutes according to product instructions before rinsing and drying with a microfiber cloth. This will help ensure that both the brush and holder are free from filth and bacteria before being stored away again.
Method 4: Use Vinegar and Dish Soap
An alternative option for those who don’t want to use harsh chemicals is a mixture of vinegar and dish soap for cleaning their bathroom cleaning brushes before storing them away again.
Start by filling a bucket or large sink with warm water then adding white vinegar and dish soap according to the desired ratio (e.g., 1 part vinegar: 2 parts soap).
Soak the brush in this solution for several minutes while scrubbing any remaining filth off it until fully clean. Rinse the scrub brush with tap water. Dry the brush with paper towels or other absorbent material if needed.
How Often Should You Clean Your Bathroom Cleaning Brush?

It is recommended that you clean your bathroom cleaning and toilet brush after every use to ensure it does not spread any germs or bacteria. Additionally, for extra safety and hygiene, it is suggested that the brush be disinfected at least once a month.
Depending on how frequently the brush is used and the condition of the bristles, you may want to consider cleaning it more often than recommended.
How Often Should You Throw Away Your Bathroom Cleaning Brush?
The lifespan of your bathroom cleaning brush will depend on how well you maintain it. Generally, it is recommended that you replace your brush every six months, or sooner if the bristles start to fray or if other signs of wear and tear become visible.
It is important to always store your brush in a dry area and keep it away from dirt and bacteria which can reduce its longevity further.
Say Goodbye to Clutter – Choose the Right Bathroom Brush Holder for Optimal Orderliness
Now that you know the various options for storing a bathroom cleaning brush, it’s time to choose one that works best for your home.
Whether you opt for a built-in plunger cabinet or a recycled container, remember that proper storage is essential for keeping your bathroom clean and sanitary. And if you feel particularly crafty, why not try making your own homemade holder for extra convenience?
With these simple tips and tricks in hand, you can ensure that your bathroom remains spick and span at all times.

