Last Updated on November 14, 2023
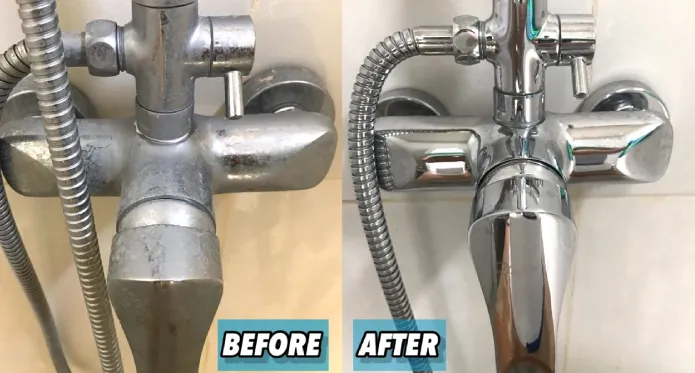
A shiny and spotless bathroom is always inviting, but over time, hard water, soap scum, and grime can cause buildup and tarnish on your fixtures. However, you can restore the shine to your fixtures and transform your bathroom with a little effort.
Wet the cloth with warm water and mild soap to kick off the journey towards sparkling bathroom fixtures. Use this to delicately cleanse the fixtures, giving extra care to spots marred by tarnish or buildup. For those persistent stains, use a non-abrasive cleaner and a gentle toothbrush to scrub them away gently.
In this comprehensive guide, we’ll discuss some DIY steps to clean tarnished bathroom fixtures effectively, leaving them sparkling like new. Let’s get started.
How to Clean Tarnished Bathroom Fixtures: A Guide to Making Them Sparkle
To make your tarnished bathroom fixtures sparkle, follow these steps to clean them thoroughly.
- Prepare your working area
- Safety precautions (optional)
- Basic cleaning with soap and water
- Applying vinegar and baking soda solution
- Scrub the bathroom fixtures
- Rinse thoroughly
- Add lemon juice for extra shine
Step 1: Prepare Your Working Area
Make sure your workspace is clean and clutter-free. Remove any toothbrushes, soap, or decorative items from the bathroom fixtures you’re cleaning. This will give you better access to the fixtures and prevent any accidental splashing of cleaning solutions onto your belongings.
Once the area is clear, gather all the necessary supplies for cleaning. This may include a cleaning solution specifically designed for bathroom fixtures, a soft cloth or sponge, and gloves to protect your hands.
Step 2: Safety Precautions (Optional)
Tarnish can be stubborn and require strong cleaning agents, which can be harsh on the skin. Wearing gloves protects your hands from the chemicals and provides a barrier against any potential bacteria or germs on the fixtures. Also, gloves provide a better grip when scrubbing and prevent accidental slips or cuts.
When choosing gloves, opt for rubber or latex gloves that are resistant to chemicals. Ensure they fit well and cover your entire hand and wrist area for maximum protection.
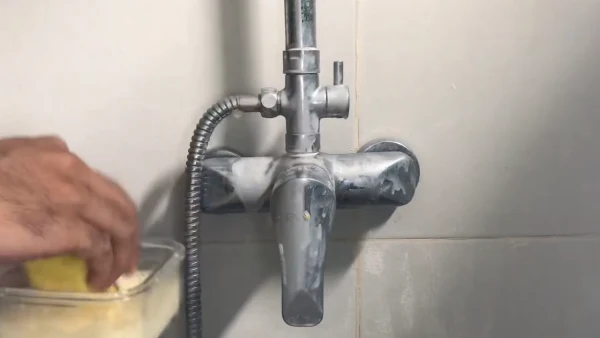
Step 3: Basic Cleaning with Soap and Water
Use a soft, clean cloth or sponge to gently wipe away surface dirt and grime from the tarnished bathroom fixtures using warm water and a little mild dish soap. Start by wetting the cloth or sponge with warm water and then add the dish soap. Ensure to wring out any excess water before applying the soap to the fixtures.
Scrub the fixtures in circular motions, paying extra attention to any particularly dirty or tarnished areas. Rinse the fixtures thoroughly with water to get rid of any soap residue.
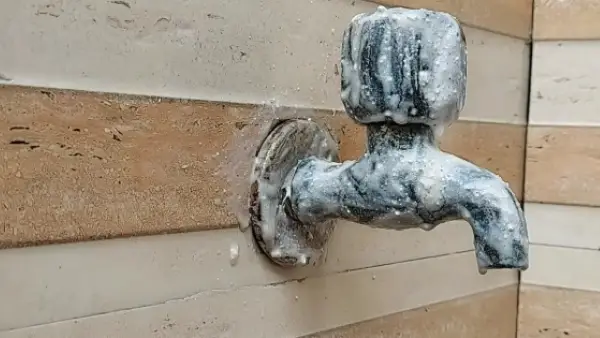
Step 4: Apply Vinegar and Baking Soda Solution
You can effectively break down the stubborn tarnish by applying the vinegar and baking soda paste. This method is especially useful for cleaning tarnished bathroom fixtures, such as faucets and showerheads.
Allow the mixture to sit for 15-20 minutes, as the chemical reaction between the two ingredients will help dissolve the tarnish.
Step 5: Scrub the Bathroom Fixtures
After the given time, gently scrub the tarnished areas with a soft-bristle toothbrush and continue until the tarnish is removed. Use gentle, circular motions to scrub the tarnished areas.
Keep an eye out for any crevices or hard-to-reach spots. If the tarnish is particularly stubborn, you may need to apply more pressure or use a toothpick to remove it carefully.
Step 6: Rinse Thoroughly
After scrubbing the tarnished areas, thoroughly rinse the bathroom fixtures with warm water to remove all residue. Be sure to use warm water, as it helps to dissolve and flush away any stubborn grime or stains. Take your time and cover all areas of the fixtures, including hard-to-reach spots.
Step 7: Add Lemon Juice for Extra Shine
Dip a soft cloth in lemon juice to achieve extra shine and rub it over the fixtures, then rinse and dry them. Lemon juice contains natural acids that work as a gentle yet effective cleaning agent. The acids in the lemon juice help to break down and remove any stubborn stains or tarnish on the fixtures.
Rubbing the lemon juice over the fixtures helps lift off any dirt or grime, revealing a brighter and shinier surface. After thoroughly rubbing the juice over the fixtures, rinse them with water to remove any residue.
How do I remove oxidation from bathroom fixtures?
Baking soda and water can scrub away the oxidation from your bathroom fixtures. This simple homemade solution can work wonders in removing tarnishes and restoring the shine to your fixtures.
Start by creating a paste with baking soda and water. Apply the paste to the affected areas and wait a few minutes. Then, gently scrub the surface in circular motions using a soft cloth or sponge.
The mild abrasive properties of baking soda will help break down the oxidation, while the water acts as a lubricant to prevent scratching. Rinse the fixture thoroughly with water and dry it with a clean cloth.
Will vinegar damage chrome bathroom fixtures?
Prolong use of vinegar on your chrome bathroom fixtures can strip off the finish and cause damage. If vinegar is exposed for a long period, it can eat away at the chrome finish, dulling and damaging your fixtures. If you clean fixtures with vinegar, make sure to rinse them as soon as possible afterward.
How often should I clean my bathroom fixtures?
You should clean your bathroom fixtures at least once weekly to maintain cleanliness and prevent any potential buildup. Start by gathering the necessary cleaning supplies, such as mild soap, warm water, a soft cloth, and a non-abrasive sponge.
Transform Your Tarnished Bathroom Fixtures from Dull to Dazzling
Cleaning tarnished bathroom fixtures may seem overwhelming and challenging, but you can return their shine quickly with the right tools and techniques.
If you follow those simple instructions, you can eliminate stubborn tarnish and restore your fixtures to their original state, making them sparkle and shine like new once again.
Taking good care of your bathroom fixtures will enhance their appearance and extend their life, saving you money in the long run. So, try these steps today and enjoy a shiny and spotless bathroom.