Last Updated on September 7, 2023
Cleaning sediment from your electric water heater is a crucial maintenance task to ensure optimal performance and extend the lifespan of your appliance. Over time, mineral deposits and sediment can accumulate at the bottom of the tank, reducing efficiency and potentially damaging the heating element.
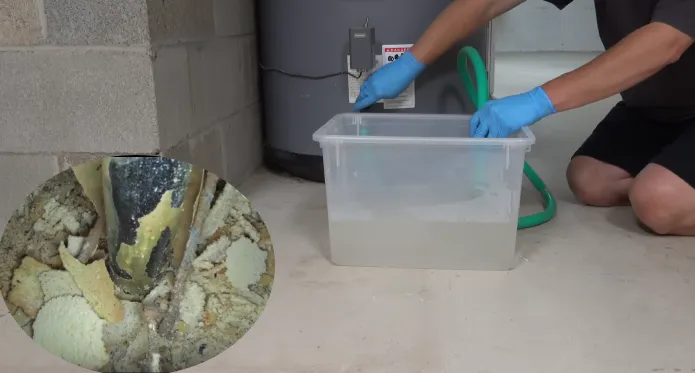
To remove sediment from your electric water heater, switch off the water heater’s power supply and close the cold water valve so water won’t get in. Afterward, you need to attach a hose pipe to the spigot on the water heater and position it for proper drainage.
Then, open a hot water faucet and slowly open the drain valve to allow the water and sediment to drain from the system.
We will talk about cleaning sediment from an electric water heater so it runs properly and gives you hot water.
How to Clean Sediment From an Electric Water Heater: Step-By-Step Guide
You need to follow several key steps to clean sediment from your electric water heater.
- Step 1: Shut off the power and cold water supply
- Step 2: Allow water to cool
- Step 3: Attach the hose and position
- Step 4: Release pressure
- Step 5: Drain the water heater
- Step 6: Turn off the drain valve
- Step 7: Turn on the cold water supply
- Step 8: Test faucets
- Step 9: Restore power and monitor
- Step 10: Test hot water
Step 1: Shut off the Power and Cold Water Supply
You need to turn off the water heater’s power to start cleaning sediment. To do this, locate the circuit breaker that controls your electric water heater in the main electrical panel of your home. This panel can be found in the basement, utility room, or garage.
Also, you’ll need to find the cold water valve that connects to your water heater. This valve is usually located near the unit’s top and connected to the incoming cold water supply line.
Rotate this valve to a 90-degree angle or ‘off’ position to prevent additional water flow while cleaning out sediment from your electric water heater.
Step 2: Allow Water to Cool
After turning off the power and cold water supply, wait about 1 to 2 hours for the water inside the tank to cool down.
Allowing the water to cool down will prevent any accidental burns or scalds that may occur if you were to handle hot water.
Step 3: Attach the Hose and Position
Once the water has had time to cool, it’s time to prepare for draining. You will need to attach a suitable hose, such as a drain hose or a garden hose, to the water heater’s drainage spigot.
If you do not have this tool, you can buy one that has sufficient pressure to clean it, but it will cost you money and increase your water heater cleaning costs.
To attach a drain or garden hose to the spigot on the water heater, simply screw the threaded end of the hose onto the spigot. Tighten it securely by hand, making sure it’s snug and leak-free.
If needed, you can use pliers to gently tighten it, but be cautious not to overtighten and risk damaging the threads or the hose.
Afterward, ensure that the hose’s other end is positioned either outside or in a drainage area where the water can drain safely.
Step 4: Release Pressure
Before draining the water heater, release any built-up pressure within the system. This helps create a smoother, more controlled flow during flushing. To accomplish this, you must turn on a hot water faucet inside the house.
Locate a hot water faucet in your home, such as in a bathroom or kitchen. Turn the faucet handle counterclockwise or to the left to open it.
Allow the hot water faucet to run for a minute or two or until you notice that the water flow slows down significantly. This indicates that pressure has been successfully released.
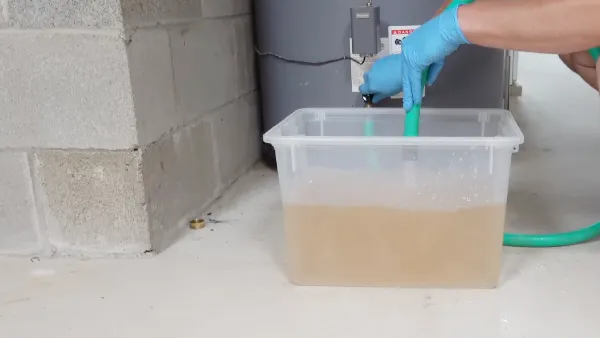
Step 5: Drain the Water Heater
With the pressure released, it’s time to start draining the water heater. Make sure you have a screwdriver or flathead piece handy, and slowly rotate the drain valve at your tank’s base to begin draining.
As you rotate the valve, be prepared for hot water to flow out through the attached hose into the drainage area. Initially, you may notice sediment being flushed out along with the water. You must continue draining until the water runs clear without any visible sediment.
Step 6: Turn off the Drain Valve
Upon successfully draining the water heater, ensure the drain valve is closed. To shut off the drain valve, carefully rotate it back to its original closed position. Do this slowly and securely to avoid leaks or damage to the valve.
Step 7: Turn on the Cold Water Supply
Now, turn the cold water valve lever or handle clockwise to reopen it and allow cold water to flow back into the system. By turning the valve clockwise, you are effectively reopening the valve and restoring cold water flow into the water heater.
Step 8: Test Faucets
After turning on the cold water supply, check your house’s faucets to ensure they are running smoothly and free from any remaining sediment.
Run each faucet individually for a few minutes and observe the water flow. If you notice any signs of discoloration or particles in the water, it may indicate that sediment is still present in your pipes. In such cases, it’s recommended to repeat the flushing process.
Step 9: Restore Power and Monitor
Once you have completed the cleaning process and tested the faucets, switch the circuit breaker back on. This will provide electricity to heat up the water again.
As you turn on the power, monitor the water heater closely as it refills with water. This filling process can take approximately 20 to 30 minutes.
Step 10: Test Hot Water
Now that you have restored power to your electric water heater and monitored it for any issues, it’s time to test the water.
To test the hot water, simply turn on various faucets in your house and let the water run for a few minutes. Pay close attention to the clarity of the water. It should be clear and free from any sediment or debris.
How do you know if your electric water heater has sediment build-up?
One way to tell if your electric water heater has sediment buildup is by listening to unusual noises like popping or rumbling. These sounds occur when pockets of boiling water are trapped among the sediments in the tank, struggling to escape.
Another indication of sediment buildup is rusty water with a foul odor coming out of your taps, suggesting that the sediments have affected the quality of your water.
Also, if you notice frequent fluctuations in water temperature or a lack of hot water despite normal usage, it could be due to sediment accumulation obstructing the heating process. Sediment obstructions may also cause small leaks near the drain valve.
How often should an electric water heater have the sediment removed?
To maintain optimal performance and prevent issues, you should remove the sediment from your electric water heater at least once every six months to a year.
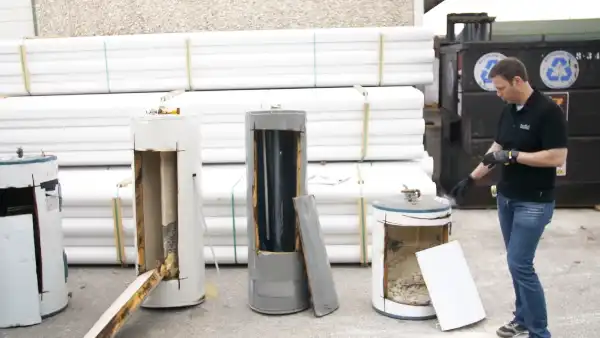
Eventually, sediments like sand, dirt, and minerals build up at the bottom. Flushing out the sediment involves draining the tank and removing any debris that has settled at the bottom.
Remove Sediment Buildup and Enjoy a Hassle-Free Hot Water Experience
When you face sediment issues in your electric water heater, take appropriate action to clean it. Following these 10 simple steps, you can effectively clean sediment buildup and ensure your water heater operates at its best.
With routine flushing, you’ll enjoy a steady hot water supply for bathing or cooking, extend the appliance’s lifespan, and maintain efficiency.
Remember, a little preventive care goes a long way in keeping your water heater running smoothly and providing you with the comfort you deserve.