Last Updated on September 6, 2023
Effective maintenance and prevention are crucial in maintaining a clean and hygienic bathroom environment. Among the common challenges you may face is preventing mold growth on tub caulk. So, how do you clean mold from tub caulk with the most effective and safe methods?
Before you begin, take safety precautions by wearing old clothes and opening the bathroom windows for ventilation. Next, prepare the cleaning solution by mixing equal parts bleach or hydrogen peroxide with water in the spray bottle.
Let the cleaning solution sit on the moldy caulk for a few minutes. Then, scrub the affected area with a stiff brush to remove any debris or dirt. Once scrubbing, rinse the cleaning solution with clean water and dry thoroughly with a towel.
Here, we will discuss these steps to banish mold from your bathtub caulk using simple yet effective techniques.
How Do You Clean Mold From Bathtub Caulk?
To clean mold from the bathtub caulk, you’ll need a few materials such as rubber gloves, a scrub brush, bleach or hydrogen peroxide, and a spray bottle. After gathering the materials, follow the steps:
- Step 01: Safety precautions
- Step 02: Prepare the cleaning solution
- Step 03: Apply the solution
- Step 04: Allow soaking time
- Step 05: Scrub the mold
- Step 06: Rinse and wipe
- Step 07: Repeat if necessary
- Step 08: Dry the area
Let’s break down each cleaning step in detail.
Step 01: Safety Precautions
Before starting, put on your gloves, eyewear, and mask for protection. Mold can release harmful spores into the air that can cause respiratory issues and other health problems.
Also, cleaning agents used to remove mold from bathtub caulk can be harsh and irritating to the skin and eyes. By wearing proper protective gear, you can minimize the risk of exposure and ensure your safety while cleaning mold off your bathtub caulk.
Step 02: Prepare the Cleaning Solution
Then, in a spray bottle, mix bleach (or hydrogen peroxide) with water. This solution is effective for cleaning mold from the bathtub caulk. And make sure to shake the bottle well to ensure proper mixing.
The bleach or hydrogen peroxide will kill the mold, while the water helps dilute the solution. Remember not to mix both bleach and hydrogen peroxide together as they can react and produce harmful fumes.
Step 03: Apply the Solution
To effectively remove the mold from your bathtub caulk, start by spraying the bleach or hydrogen peroxide solution directly onto the affected areas. Make sure to cover all the moldy spots thoroughly.
Step 04: Allow Soaking Time
Let the solution sit on the caulk for 10-15 minutes to penetrate and loosen the mold effectively. This soaking time is crucial for allowing the solution to work its magic.
During these minutes, you can take a break or attend to other tasks around the house. The longer you let it sit, the better the chance of breaking down and removing the mold completely. So be patient and let it do its job.
Step 05: Scrub the Mold
Then, gently scrub the moldy areas with an old toothbrush or scrub brush, applying some pressure while not damaging the caulk.
Ensure that all moldy areas are covered and focus on removing any stubborn stains. The brush’s bristles will help loosen and remove the mold from the caulk. Take your time and thoroughly scrub to ensure a clean and mold-free bathtub.
Step 06: Rinse and Wipe
After scrubbing the moldy spots, rinse the area thoroughly with water and use a microfiber cloth or sponge to wipe away any remaining residue.
Remove all traces of cleaning solution and mold from the bathtub caulk. This ensures that no residue is left behind, which can lead to further growth of mold.
Step 07: Repeat if Necessary
If the mold persists after rinsing and wiping, don’t worry. You can repeat the cleaning process to tackle the stubborn mold. Just scrub a bit harder or use a more concentrated solution on the affected areas.
Step 08: Dry the Area
Moisture is still a concern after you remove the mold from your bathtub caulk. Mold thrives in damp environments, so it’s important to eliminate any excess water.
To limit future growth, keep the area dry by using old towels to dry it. Grab some old towels and thoroughly dry the area where you removed the mold. This simple step will help ensure that mold doesn’t have a chance to grow back.
What can you do to prevent mold from tub caulk?
Regularly cleaning your tub and caulk with a mold-resistant cleaner can help prevent mold from forming. Adequate ventilation is also important in reducing moisture buildup, so use a bathroom fan or open a window during and after showers.
Also, drying the tub and caulk thoroughly after each use with a towel can minimize the chances of mold growth. By incorporating these simple preventive measures into your routine, you can maintain a clean and mold-free environment around your tub caulk.
Should you remove moldy caulk from the bathtub?
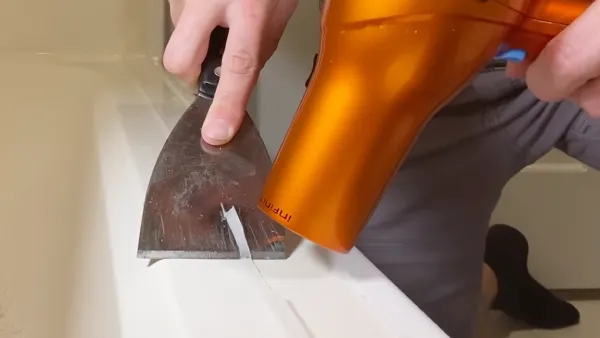
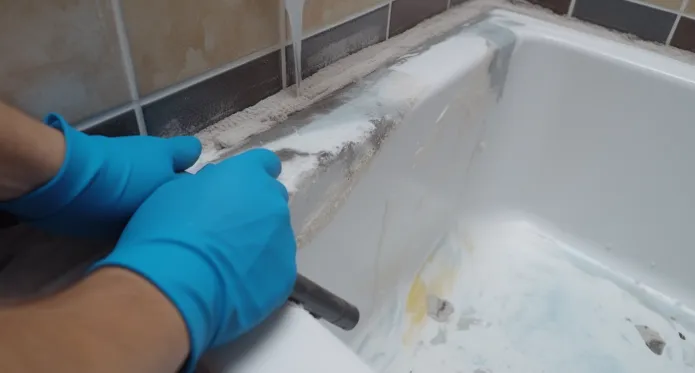
Tub caulk that is too old does not clean well. It’s, therefore, time to remove and replace caulk when it shows mold. The best way to do this is by using a utility knife or razor blade to cut away the old caulk.
After scraping off all of the old caulk residue, apply a biocide such as bleach or vinegar to the area. Then, reapply the new caulk and let it dry for at least 12 hours before using your bathtub again.
Get Rid of Moldy Caulk in Your Bathtub
Cleaning mold from your bathtub caulk is straightforward. Just follow the simple steps outlined above, and you’ll have a sparkling clean bathroom in little time at all.
By integrating proper ventilation practices, diligent drying routines, and timely inspections, you can create a sterile environment for indoor mold growth. These preventive measures contribute to the cleanliness and aesthetic appeal of your bathroom and uphold the health and well-being of your household.
Remember, a little proactive effort today can save you from more extensive and challenging cleaning tasks in the future.