Last Updated on September 7, 2023
Cleaning a gas water heater burner ensures your appliance operates efficiently and safely. Over time, soot, debris, and sediment can accumulate on the burner assembly, reducing its performance and increasing gas consumption.
The process of cleaning a gas water heater burner is pretty simple. You have to remove the cover panel first. Then, remove the burner assembly from the gas valve.
After that, use a soft-bristle brush and vacuum to clean the burner components, combustion chamber, and flame aerator.
We’ll explain how to clean a gas water heater burner step-by-step, enabling you to achieve the best results.
How to Clean Gas Water Heater Burner: Step-By-Step Guide
To clean a gas water heater burner, follow a series of steps.
Step 1: Turn off the water heater
Step 2: Remove the cover panel and combustion door
Step 3: Disconnect the burner assembly from the gas valve
Step 4: Slide out the burner assembly
Step 5: Clean the burner assembly
Step 6: Reassemble the burner
Step 7: Install the combustion door
Step 8: Reconnect the tubing
Step 9: Turn on the water heater
Let’s go over how to clean your gas water heater burner in detail.
Step 1: Turn off the Water Heater
To begin, you’ll need to locate the shut-off switch for your water heater and turn it off before cleaning the gas burner. The shut-off switch is typically located near the water heater unit. Once you’ve found it, simply turn it to the ‘OFF’ position.
After turning off the water heater, you must shut off the gas supply valve leading to the appliance. Locate this valve near where the gas line connects to the water heater’s base. Turn it to the ‘OFF’ position to stop any gas flow into the appliance.
Step 2: Remove the Cover Panel and Combustion Door
Once you’ve turned off the water heater and shut off the gas supply valve, it’s time to remove the cover panel.
To start, locate the cover panel on your water heater, which can be found either on the front or side of the appliance. Depending on your model, it may be fixed with screws, clips, or fasteners.
Use the appropriate tools, such as a screwdriver or wrench, to carefully remove these fasteners without losing them.
Once all the fasteners are removed, gently pull or slide off the cover panel to expose the interior components, including the burner assembly.
To remove the combustion door, unfasten the hex nuts or Torx screws securing it. Before doing so, be sure to take note of the gasket lining the door. This gasket is vital in maintaining a proper seal and preventing any gas leakage.
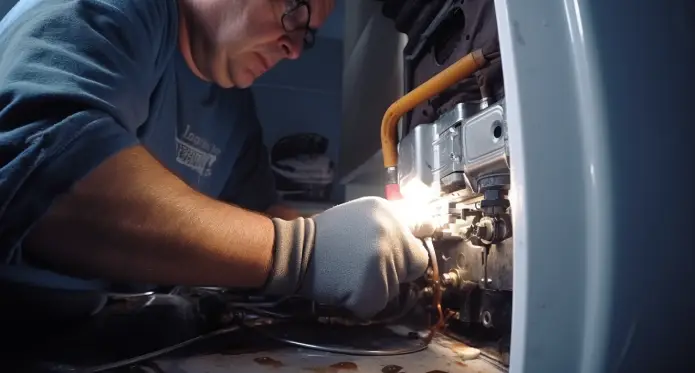
Step 3: Disconnect the Burner Assembly From the Gas Valve
Disconnect it from the gas valve carefully as you work on the burner assembly.
You will need a 3/8-inch wrench and a 7/16-inch wrench. First, identify the igniter valve terminal where the wires are connected. Take caution and disconnect these wires to avoid any electrical hazards.
Next, locate the hex-head connections securing the gas valve’s burner assembly. There are three main connections to address: the thermopile connection, the pilot gas supply connection, and the central burner connection.
Using your appropriate wrenches, gently loosen and remove each hex-head screw to disconnect these connections from the gas valve.
Remember to ensure proper ventilation to dissipate any trapped gas safely during this process.
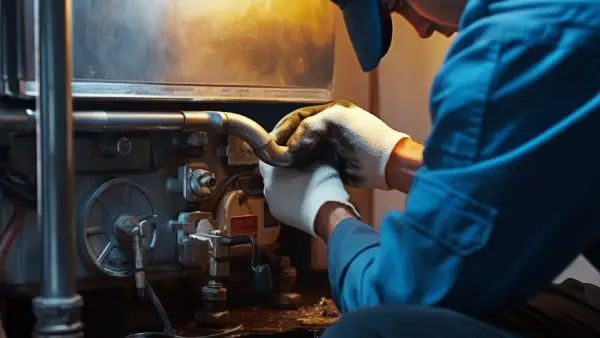
Step 4: Slide Out the Burner Assembly
Now, you have to remove the burner assembly. Locate the burner assembly inside the combustion chamber.
Carefully grasp the assembly and gently pull it towards you, ensuring it does not damage any surrounding components or connections. As you slide out the burner assembly, pay close attention to any gaskets that may be attached.
Step 5: Clean the Burner Assembly
After you’ve removed the burner assembly, it’s time to clean it. Use a soft-bristle brush and a vacuum cleaner with a brush attachment to remove any dust, debris, or soot from the burner components.
Pay close attention to the burner ports, as they can easily become clogged with residue. If you encounter crusty deposits on the burner ports, gently scrub them with an old toothbrush to dislodge the buildup.
Next, use the vacuum cleaner to clean both the combustion chamber and the flame arrestor beneath the burners. This will ensure unobstructed airflow for proper combustion.
Also, if your water heater has intake air filters, remove and clean them according to the manufacturer’s instructions to ensure optimal airflow.
In some cases, you may need to use water to clean stubborn deposits. Put the burner into your basin and turn on the water tap. For cleaning, you can use a soft brush. Carefully rinse the burner circle part with water.
After that, dry the burner with a dry cloth. For a more thorough drying, use tissue paper after that. Just make sure all components are completely dry before reassembling everything together again.
Step 6: Reassemble the Burner
After cleaning the burner assembly, carefully align it with any mounting guides, brackets, or slots provided and slide it back into the combustion chamber.
Ensure the burner is positioned correctly to ensure the proper functioning of the gas water heater.
Step 7: Install the Combustion Door
To properly install the combustion door, position it in its designated place. Align it carefully to ensure a proper fit.
Next, diagonally secure the door by tightening the hex nuts or Torx screws. This will help distribute even pressure on the gasket, ensuring a tight seal and preventing any gas leaks.
Step 8: Reconnect Tubing
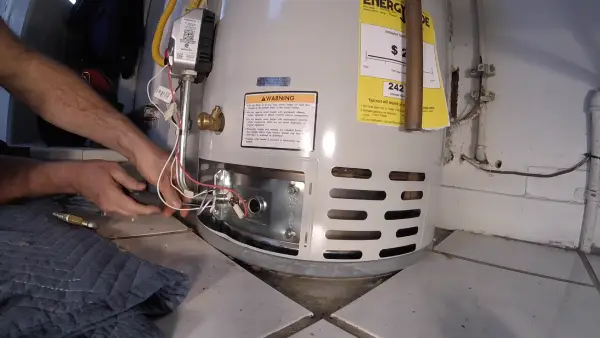
Ensure you carefully reconnect the tubing to its respective connections on the burner assembly, ensuring a secure fit.
To reconnect the tubing, identify the thermocouple, manifold tube, and pilot tube connections on the burner assembly.
Carefully align each tube with its corresponding connection point and gently push them together until they fit snugly. Use wrenches to tighten the tubing.
Step 9: Turn on the Water Heater
Once you have completed the previous steps, it’s time to ignite the burner and start heating your water.
Before doing so, it is crucial to test for any gas leaks. Take a few moments to ensure proper ignition. Once the pilot light is lit and stable, turn the gas control valve back on by setting it to the ‘ON’ position. This action allows gas flow to reach the main burner.
Can you use anti-corrosion spray to clean the gas water heater burner?
Using an anti-corrosion spray to clean a gas water heater burner is not recommended. While these sprays effectively prevent rust and corrosion on metal surfaces, they are not designed for cleaning.
Utilizing an anti-corrosion spray for this task could result in incomplete removal of deposits. It may even introduce foreign substances into the burner assembly, compromising efficiency and safety.
How often should you clean a gas water heater burner?
The frequency of cleaning a gas water heater burner depends on usage and conditions. As a general guideline, it’s recommended to clean your gas water heater burner at least once a year.
However, cleaning every six months might be more appropriate if the heater is heavily used or operates in an environment with high dust or debris levels.
Ensure Sustained Efficiency of Your Gas Water Heater
With the help of this comprehensive step-by-step guide, you can now effectively clean your gas water heater burner. Proper maintenance ensures efficient operation and safety.
Regular cleaning, about once a year or more often if needed, can help prevent performance issues and save on energy consumption.
By following these instructions diligently and using the right tools, you’ll ensure that your gas water heater continues to provide reliable hot water for your needs. Keep your appliance in top condition, and enjoy the benefits of a well-maintained gas water heater.