
Last Updated on November 14, 2023
Slow-draining showers are an annoying and inconvenient issue to deal with. The accumulation of hair, soap scum, and other debris in your drain can lead to water pooling around your feet, making your shower experience less pleasant.
There are effective methods to combat this problem and restore your shower’s drainage efficiency. Baking soda and vinegar, the dynamic duo of natural cleaning, offer a gentle yet powerful solution.
Using a plunger can be remarkably effective if you want a more hands-on approach. For more stubborn clogs, a plumber’s snake is your ally.
Here we will describe all possible methods in detail, providing step-by-step instructions on implementing each method.
How to Clear a Slow Draining Shower: 4 Methods with Steps
You can try several methods to clear the clog and get your shower flowing smoothly again. The following are listed:
Method 1: Using baking soda and vinegar
- Step 1: Clean hair and debris
- Step 2: Prepare baking soda solution and pour it
- Step 3: Pour vinegar
- Step 4: Let it sit
- Step 5: Flush with hot water
Method 2: Using a plunger
- Step 1: Create a seal
- Step 2: Apply petroleum jelly
- Step 3: Plunge rapidly
- Step 4: Check drainage
Method 3: Using a plumber’s snake
- Step 1: Prepare the drain snake
- Step 2: Rotate the snake
- Step 3: Maneuver and extract
- Step 4: Repeat if necessary
Method 4: Using chemical drain cleaners (With caution)
- Step 1: Choose the right cleaner
- Step 2: Apply the cleaner
- Step 3: Wait and rinse
Let’s examine each method in detail so you can effectively resolve the problem of a slow-draining shower drain.
Method 1: Using Baking Soda and Vinegar
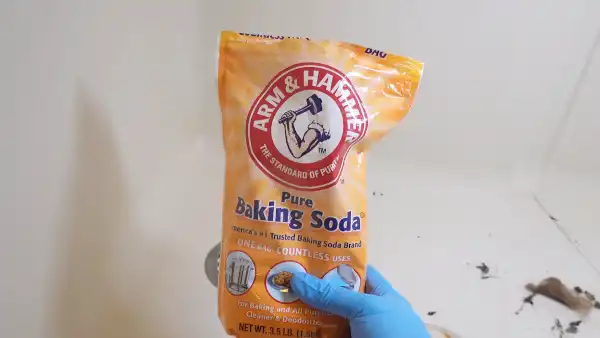
In order to clear a slow-draining shower, mixing baking soda with vinegar works well. Follow these steps to implement this solution:
Step 1: Clean Hair and Debris
To begin, carefully remove any visible hair and debris from the drain using gloves and a paper towel or wire hanger. Gently pull out any accessible gunk that may be causing the slow-draining shower.
Take your time to remove as much hair and debris as possible, as this will help improve water flow down the drain. Dispose of the hair and debris properly after cleaning.
Step 2: Prepare Baking Soda Solution and Pour It
After removing hair and debris from the drain, carefully mix baking soda with warm water to create a paste. Use half a cup of baking soda and enough warm water to form a thick consistency.
Once your paste is ready, pour it down the drain, ensuring it goes as far down as possible. The mixture will help break down any remaining clogs and clear your slow-draining shower.
Step 3: Pour Vinegar
Next, pour the vinegar down the drain and cover it to contain the fizzing reaction. The white vinegar will react with the baking soda solution, creating a powerful foaming action that helps break down any clogs or buildup in the pipes.
Use half a cup of white vinegar and immediately cover the drain with a cloth or stopper to prevent any mess or overflow.
Step 4: Let It Sit
Let the baking soda and vinegar mixture sit for 30 minutes to an hour to dissolve soap scum, hair, and other debris.
During this time, the powerful combination will work its magic by fizzing and bubbling away at the clogged material. The longer you allow it to sit, the more thorough the cleaning process will be.
Step 5: Flush with Hot Water
Now, pour a pot of boiling water down the drain to flush away any dissolved debris and complete the cleaning process.
The hot water will help dislodge any remaining residue and clear the drain effectively. Be cautious when handling the boiling water to avoid burns. Slowly pour it down the drain, ensuring that it reaches all areas.
Method 2: Using a Plunger
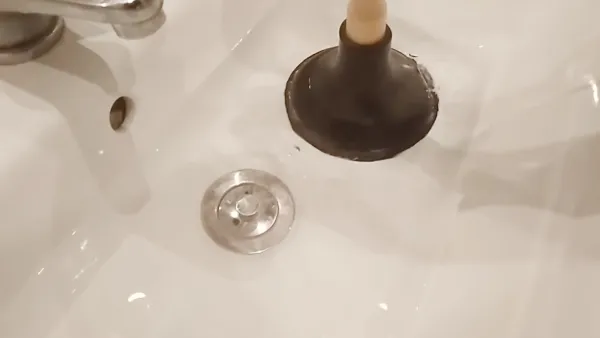
Another good method is to use a plunger. Follow these four steps to clear a slow-draining shower with a plunger:
Step 1: Create a Seal
For starters, ensure you put enough water in the shower base to cover the plunger cup’s bottom. This is because the water helps create an effective seal when plunging.
By creating a seal, you’ll be able to generate enough pressure to dislodge any clogs and restore proper drainage in your shower.
Step 2: Apply Petroleum Jelly
Applying petroleum jelly around the edges of the plunger cup is crucial for achieving a better seal against the drain.
This simple yet effective technique helps ensure no water escapes from the sides, allowing maximum suction power to unclog your shower efficiently.
Step 3: Plunge Rapidly
Put the sink plunger on the drain, ensuring it seals tightly, and start plunging rapidly using firm pressure to dislodge the clog.
Plunging up and down with force will effectively break apart any blockages in your shower drain. The suction the plunger creates will help dislodge debris and restore proper water flow. Continue this motion for several minutes until you notice a drainage improvement.
Step 4: Check Drainage
Once you have finished plunging, take the plunger out of the sink and examine whether the water drains more quickly. Check for any signs of improvement in the drainage.
Repeat the plunging procedure in case the water is still draining slowly. Remember to apply rapid and forceful plunges to remove obstructions effectively.
Continue this step until you notice a significant improvement in the speed of water drainage.
Method 3: Using a Plumber’s Snake
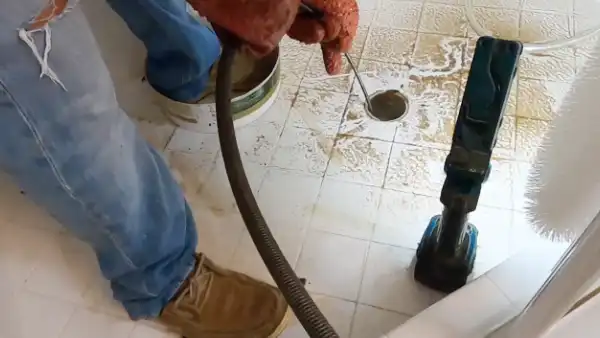
Using a plumber’s snake is another effective method of clearing a slow-draining shower. To apply, please follow these steps:
Step 1: Prepare the Drain Snake
Make sure to remove the drain cover if it’s there. This will give you access to the drain pipe.
Once the cover is removed, insert the plumber’s snake into the drain. Gently push it down the pipe, applying firm pressure as you go.
The snake will help break up any clogs or debris causing your shower to drain slowly.
Step 2: Rotate the Snake
Now that you’ve prepared the drain snake, it’s time to take action. Rotate the snake clockwise while pushing it deeper into the drain so it can clear.
This rotational motion helps break up and dislodge any clogs causing the blockage. Keep turning the snake steadily until you feel resistance or until the clog is cleared.
Step 3: Maneuver and Extract
Once the snake has passed through the blockage, slowly pull it out, bringing debris with it. To maneuver and extract effectively, keep a firm grip on the snake and gently twist and turn it as you pull back. This will help dislodge any remaining obstacles in the drain.
Be patient and take your time to ensure thorough removal of debris. Remember to clean and sanitize the snake after use for future maintenance.
Step 4: Repeat if Necessary
You may need to repeat the process if the drain is still unclear. You need to ensure that the water drains freely to prevent any further clogs.
To do this, carefully maneuver and extract all remaining debris or hair from the drain. Use a plunger or a plumbing snake if necessary. Keep repeating these steps until you achieve a fully functioning, unclogged shower drain.
Method 4: Using Chemical Drain Cleaners (with Caution)
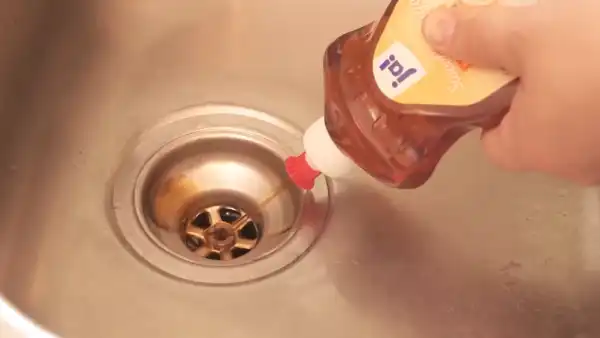
You need to follow a few key steps to use chemical drain cleaners effectively and safely.
Step 1: Choose the Right Cleaner
Choose the appropriate drain cleaner chemical for your type of clog and plumbing. Read the manufacturer’s instructions carefully to ensure you’re using it correctly.
Different cleaners are designed for different types of clogs, such as hair or soap scum.
You should select a product that’s safe for your specific plumbing system, whether it’s metal or plastic pipes.
Step 2: Apply the Cleaner
Wear protective gloves and eyewear before handling the chemical drain cleaner to avoid skin and eye irritation.
Carefully pour the recommended amount of drain cleaning solution down the drain to avoid any splashing. Remember, this is a crucial step in addressing the issue at hand.
Keep pets and children away from the area to ensure their safety throughout the process.
Step 4: Wait and Rinse
After pouring a suitable amount of drain cleaning chemical, wait for the specified time before rinsing the drain with plenty of water. This step is crucial as it effectively allows the chemical to break down the clog in your shower drain.
Be patient and give it enough time to dissolve the obstruction completely. Once the specified time has passed, flush the drain with copious amounts of water to wash away all traces of the dissolved clog.
How to prevent slow-draining showers?
One effective way to avoid issues with water flow in your shower is by installing a hair catcher or strainer over the drain. This will prevent hair and debris from clogging the pipes and causing slow draining.
Also, regularly cleaning the drain after each use and using a mesh screen to catch larger particles before they enter the drain can help maintain proper water flow.
Flushing the drain with hot water periodically can also prevent buildup and keep your shower draining efficiently.
Can you use sulfuric acid to address a slow-draining shower?
Use sulfuric acid cautiously to resolve a slow-draining shower due to its hazardous nature.
To address a mild clog, slowly pour approximately 200 ml of sulfuric acid into the drain and ensure it reaches the clog.
After 10 seconds, gradually introduce water into the drain. This combination helps break down the clog and clear the drain. Remember to wear protective gear and work in a well-ventilated area.
Keep Your Shower Drainage High-Performance and Worry-Free
You now know that a slow-draining shower doesn’t have to be a constant annoyance. With these effective methods, you can tackle the issue head-on and restore your shower’s drainage efficiency.
The natural power of baking soda and vinegar, the hands-on approach of plunging, the precision of a plumber’s snake, or the safe use of chemicals can help you clear clogs.
Regular maintenance and preventive measures can help you avoid future slowdowns so your showers stay refreshing and hassle-free.