Last Updated on November 9, 2023
Silicone is a commonly used material for sealing around the kitchen sink. Despite its many benefits, silicone gets dirty and contaminated over time from cooking spills, making it hard to clean. Removing the stubborn silicone caulking that accumulates around the kitchen sink edges can also be tricky.
However, there are several ways to remove silicone from your kitchen sink. You can scrape the silicone caulk with a Putty Knife or Sharp Razor Blade. Also, you can use chemicals, like white vinegar, Acetone, or Denatured Alcohol, especially on kitchen sinks used for preparing food.
During this article, we will discuss different methods to clean silicone from your kitchen sink effectively. We’ll also reveal the secret ingredient that can dissolve any remaining silicone.
What to Use to Clean Silicone From Kitchen Sink | 2 Different Methods

You have two different methods to try to clean silicone from the kitchen sink.
- Using non-chemical or physical methods
- Using chemical methods
1. Using Non-Chemical or Physical Methods
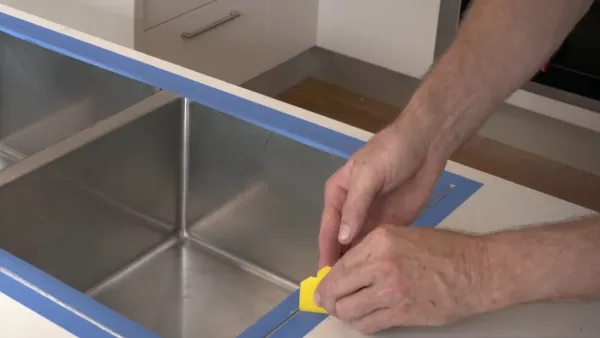
Manual labor is often the first port of call when removing silicone from your kitchen sink. Using everyday household items like a razor blade, putty knife, or plastic scraper, you can slowly but surely chisel the caulk away.
Alternatively, if you’re struggling to get the caulk loose, heat it with a hairdryer first to make it more pliable.
Another tip is to wet the caulk with water before removing it, as wet caulk is more malleable than dry caulk. However, be gentle but firm when using a knife to lift and scrape the caulk away so you don’t damage the sink.
2. Using Chemical Methods
If the non-chemical methods aren’t doing the trick, other options are available, albeit more aggressive. Stronger chemicals like acetone or denatured alcohol are popular choices for quick results.
However, if you’re concerned about using harsh chemicals, particularly on a sink used for food prep, like a kitchen sink, there are alternatives. White vinegar is a food-safe option that can be used to soak the silicone caulk, although it might take longer to work than acetone or denatured alcohol.
It’s essential to remember that when using chemical methods to clean silicone caulk, you should always use them with caution and follow the instructions.
How to Remove Silicone Caulk Without Chemicals From the Kitchen Sink?
To easily remove silicone caulk without using chemicals from your kitchen sink, you’ll need to follow some steps:
Materials and Tools You’ll Need:
- Utility Knife or Razor Blade
- Plastic Scraper or Putty Knife
- Hairdryer
- Rubbing Alcohol
- Cotton Ball
STEP 1. Prepare the Working Area
Make sure you clear any debris and dry the working area before starting the process of removing silicone caulk from your kitchen sink. Use a soft cloth or paper towel to wipe away any dust, dirt, or other debris that may have accumulated.
STEP 2. Heat & Softening the Silicone Caulk
Use the hairdryer to heat the silicone caulk, making it easier to remove from your kitchen sink. By applying heat to the caulk, you’re softening it and making it more pliable, making it easier to peel off.
Start by plugging in the hairdryer and setting it to the highest heat setting. Hold the hair dryer close to the caulk line and heat it briefly. Be careful not to overheat it. The heat will soften the caulk, making it more flexible and easier to remove.
STEP 3. Cut and Scrape the Caulk
Take a utility knife or razor blade and carefully make several cuts along the caulk line to begin removing the silicone from your kitchen sink. Start by finding a suitable angle to make the cuts, ensuring you’re gentle and avoiding any sink or countertop damage.
Once you have made an initial cut, use a plastic scraper or putty knife to pry up the caulk and gently peel it away. Work slowly and methodically, making additional cuts and using the scraper or putty knife to scrape away as much caulk as possible.
STEP 4. Clean Remaining Residue
Rub a cotton ball soaked in rubbing alcohol on the remaining residue to dissolve and loosen the stubborn caulk bits. The rubbing alcohol acts as a solvent, breaking the caulk and making it easier to remove.
Be gentle while rubbing to avoid damaging the sink surface. Use circular motions and apply slight pressure to ensure thorough cleaning. As you continue rubbing, you’ll notice the residue coming off.
If any stubborn bits are left, simply apply a bit more rubbing alcohol and continue rubbing until the residue is completely dissolved.
What will dissolve silicone residue after removing it?

Simply pour some vinegar onto the silicone residue and let it soak for a few minutes before scrubbing it away with a sponge. Vinegar is a mild acid that effectively breaks down silicone and makes removing it easier. It’s a safe and affordable option found in most households.
If the vinegar doesn’t fully dissolve the residue, use rubbing alcohol or WD-40. These substances have stronger solvents that can further break down the silicone.
However, note that industrial-grade isopropyl alcohol should only be used as a last resort, and it’s recommended to seek professional help if the residue is particularly stubborn.
How long to leave the vinegar on the silicone to remove it?
You should let the vinegar sit on the silicone for at least 15 minutes before attempting to remove it. This is because vinegar is a natural solvent and needs time to break down the silicone.
When you apply the vinegar, completely saturate the affected area. You can use a spray bottle or a cloth soaked in vinegar.
After letting it sit for 15 minutes, you can use a scrub brush or a sponge to scrub away the silicone residue gently. Rinse the area thoroughly with water afterward to remove any remaining vinegar.
No More Struggle with Removing Silicone Around Your Kitchen Sink: Use the Proper Method
Silicone can be a real pain to clean, especially when it accumulates around your kitchen sink. Using a physical method along with some water or heating, you can use chemical treatments to dissolve the silicone and eliminate any residues.
Whatever method you choose, follow the safety precautions, use the right tools and materials, and test a small spot before proceeding with the entire sink.
We hope the tips and guidelines discussed in this article have helped you solve your silicone cleaning challenges. Once again, you will have a sparkling, clean kitchen sink.
