Last Updated on September 6, 2023
A hot water heater’s anode rod plays a big role in maintaining its performance. Over time, this essential component can deteriorate due to its sacrificial nature.
As you strive to ensure the optimal functionality of your water heater, you might wonder whether it’s possible to clean the anode rod to extend its lifespan.
But you cannot clean an anode rod on your electric hot water heater. The anode rod’s purpose is to attract corrosive elements in the water, thereby protecting the tank from corrosion.
As it corrodes, it protects the tank lining. Over time, the anode rod will naturally degrade, and attempting to clean it would not restore its effectiveness.
We’ll talk about how to tell if your electric hot water heater’s anode rod is bad and how to change it.
5 Indications of a Bad Anode Rod on Electric Hot Water Heater

Identifying a bad anode rod in your electric hot water heater can prevent corrosion and extend its lifespan. Here are several indicators that suggest your anode rod might be in need of replacement:
- Rotten egg smell
- Discolored water
- Rust and corrosion
- Noises
- Leaking water heater
Let’s examine each indication of a bad anode rod in more detail.
- Rotten Egg Smell
One of the tell-tale signs that your electric hot water heater anode rod is bad is a rotten egg-like odor emanating from your hot water.
This foul smell indicates a deteriorating anode rod that can no longer prevent sulfur bacteria from flourishing in your water tank. Due to these bacteria, hydrogen sulfide gas is released, giving off the smell of rotten eggs.
- Discolored Water
If you notice brown or rusty water coming from your tap, it clearly indicates that there’s something wrong with your electric water heater’s anode rod.
Your water heater’s anode rod prevents rust and corrosion from damaging its interior.
But, when the anode rod begins to decay or erode due to its sacrificial nature, your water tank becomes vulnerable to the issues it’s meant to prevent.
As the rod deteriorates, your water heater is at risk of developing rust and corrosion, leading to discolored water and sediment accumulation within the tank.
Leaving this problem unattended could lead to irreversible damage to the tank, causing leaks, and bursts, ultimately requiring costly repairs.
- Noises
Unusual popping or cracking sounds coming from your electric water heater can indicate sediment buildup, which can be linked to a deteriorating anode rod.
An anode rod that can’t do its job allows sediment, including sand, rust, and limescale, to amass at the bottom of the tank.
- Leaking Water Heater
A leaking hot water heater is a surefire sign the anode rod is not adequately protecting the tank against rust and corrosion.
When the tank corrodes, it weakens and eventually develops cracks that lead to leaks and irreparable damage. If you notice corrosion on your anode rod, replace it right away to avoid costly repairs.
How to Change an Electric Hot Water Heater Anode Rod?
As you can’t clean the electric hot water heater anode rod, you need to buy a replacement. The purchase will increase the overall cost of cleaning your water heater. Then, you’ll need to follow a series of steps to change it.
Step 1: Prepare for Replacement
To begin with, you will need to prepare for the replacement. You need to turn off the electricity. Locate the circuit breaker panel in your home and find the breaker labeled for the water heater. Flip it into the ‘Off’ position.
Next, turn off the cold water supply by turning it clockwise or to the ‘Off’ position. This valve is usually located near the top of the water heater.
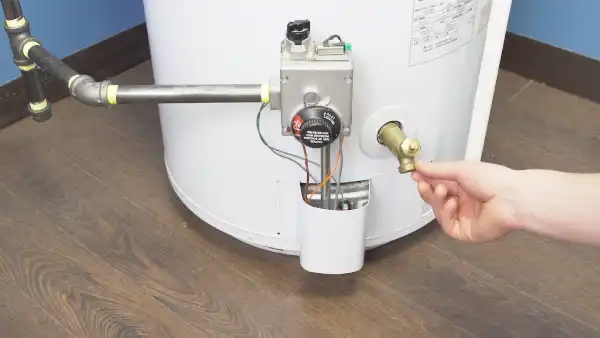
Also, connect a garden hose securely to the drain valve’s threaded outlet at the bottom of the water heater. Make sure there are no leaks in this connection.
The other end of the hose should lead outside or to a suitable drainage area for easy disposal of water during maintenance.
Step 2: Drain Water
When you’re done preparing the water heater, drain it. You’ll need to open a hot water faucet nearby to relieve pressure.
Then, slowly turn the drain valve counterclockwise or in the “Open” direction to let out about 10-15% of the tank’s water. This will start the water flowing out of the hose.
Step 3: Locate and Remove the Old Anode Rod
Once the water is drained, it’s time to find and take out the old anode rod. Your electric hot water heater’s anode rod is typically visible at the top of the tank. But, in some cases, it might be located under the water heater’s sheet metal top or attached to the hot water outlet nipple.
To remove this crucial component, you’ll need a wrench or socket to loosen and unscrew it from its position. Depending on how corroded it is, you may encounter some resistance. In such cases, applying lubricant can help make the process smoother.
Step 4: Wrap Threads of New Anode Rod
Once your old anode rod has been removed, you will need to wrap the threads of your new anode rod with Teflon pipe thread sealing tape to ensure a secure seal.
Start at the base of the threads and wrap the tape in a clockwise direction, overlapping the tape slightly as you go until you reach the end of the threads.
Step 5: Install the New Anode Rod
Now that you have wrapped the threads of the new anode rod, it’s time to move on to the next step: installing it on the heater.
To ensure a proper installation, insert the new anode rod into the same spot where the old one was removed. Grab your wrench or socket and securely tighten the new anode rod.
Position the tool over the hexagonal head of the anode rod and turn it clockwise with gentle pressure. As you do so, you will feel some resistance as the anode rod threads into place. Keep turning until it is snugly and securely in position.
Be cautious not to over-tighten, as this can lead to threading issues or damage your water heater.
Step 6: Restore Water Supply and Check for Leaks

When you’ve installed the new anode rod, turn on the cold water supply valve to fill the tank and open the hot water faucet to let the air out.
Monitor the connections for any leaks as the tank refills so you can address any problems immediately if they arise.
Step 7: Turn on the Power
After replacing the anode rod and ensuring all the connections are secure, you can turn on the hot water heater.
Locate your home’s circuit breaker panel and find the circuit breaker for the water heater. Flip the corresponding breaker switch into the “On” position.
The water heater will be powered up again. Give the water heater a few moments to start up and begin heating the water.
How often do you change the anode rod on an electric water heater?
Changing the anode rod every 3 to 5 years is recommended for optimal maintenance and longevity of your electric water heater.
Doing so can prevent leaks and water damage, effectively extending the water heater’s lifespan to well over 20 years.
Neglecting this crucial upkeep can result in the need for a full water heater replacement in as little as 10 years of use.
What happens if you don’t replace the anode rod in your electric water heater?
If the electric water heater’s anode rod is not replaced when necessary, the tank becomes susceptible to a range of detrimental effects.
Without a functional anode rod, the water heater tank becomes vulnerable to rust, corrosion, and the adverse impacts of minerals and chemicals in the water supply.
Over time, this corrosion can lead to leaks, reduced efficiency, and even the need for a premature replacement of the entire water heater.
Change the Anode Rod Timely and Extend the Life of Your Electric Water Heater
It’s now clear that you cannot clean the hot water heater’s anode rod. So, when you see the indications that we’ve discussed, replace your electric hot water heater’s anode rod promptly.
Doing so will safeguard your water heater against rust, corrosion, and potential leaks. Try to replace the anode rod about every 3 to 5 years, ensuring your appliance’s longevity and avoiding premature replacements.
With proper maintenance, your electric water heater can provide years of reliable and efficient performance, ensuring a steady hot water supply whenever needed.

